Your MP3s from Google Drive in Music Assistant on Home Assistant

By Thomas Steiner. Written on . Audio Home Automation Technical
Like most millennials, I grew up with Napster, then Kazaa, then eDonkey2000, obviously CD rips, and of course LAN parties. Over the years, this has led to a large collection of completely legal MP3 files that I have backed up on two large external USB spinning disks that haven't spun for a long time now, but the files also exist on Google Drive.
I'm also heavily invested in the Home Assistant ecosystem, which lets you install a full-featured music player app called Music Assistant.
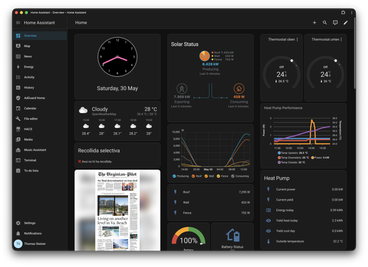
These days, of course I pay for my music (we have the YouTube Music family plan), but I recently thought it'd be fun to revive my old MP3 collection. This blog post describes how to connect Google Drive to Music Assistant on Home Assistant.
Create a rclone configuration for Google Drive
The first step is running rclone, a command-line program to manage files on cloud storage. Among many other providers, it supports Google Drive. Download rclone to your regular computer (that is, very likely, not your Home Assistant), and then follow the instructions to configure rclone for Google Drive. This requires you to go through the hell that is Google's Cloud Console, but it's a one-time setup. All you need in the end is a configuration file that you then have to copy over to your Home Assistant. Essentially, you run the configuration wizard, show the configuration file, and then copy its contents.
rclone config
rclone config show
It should look something like the following snippet, but of course with your own client ID, client secret, and token:
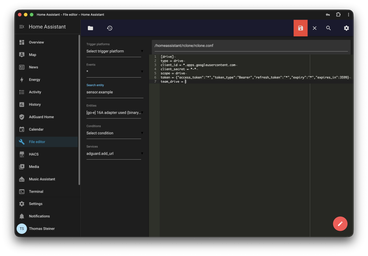
[drive]
type = drive
client_id = *.apps.googleusercontent.com
client_secret = *-*
scope = drive
token = {"access_token":"*","token_type":"Bearer","refresh_token":"*","expiry":"*","expires_in":3599}
team_drive =
In Home Assistant, use the File editor addon (app) and create a file called rclone.conf in the config/rclone directory. Paste the contents of your rclone configuration file into it and save it.
Set up rclone in Home Assistant
Now that you have the rclone configuration file in place, you need to set up rclone to serve your Google Drive as a WebDAV server. Install the Advanced SSH & Web Terminal app in Home Assistant. Open its Configuration tab and where it says Options, click the three dot menu and select Edit in YAML. Add the following configuration to it, which will install rclone and then start a WebDAV server on port 8080 that serves your Google Drive. This will be run automatically each time you start Home Assistant.
ssh:
  username: hassio
  password: passw0rd # ⚠️ Change this to your own password!
  authorized_keys: []
  sftp: false
  compatibility_mode: false
  allow_agent_forwarding: false
  allow_remote_port_forwarding: true
  allow_tcp_forwarding: false
zsh: true
share_sessions: false
packages:
  - rclone
init_commands:
  - >-
    rclone serve webdav drive: --addr :8080 --baseurl /google_music --config
    /config/rclone/rclone.conf --vfs-cache-mode full &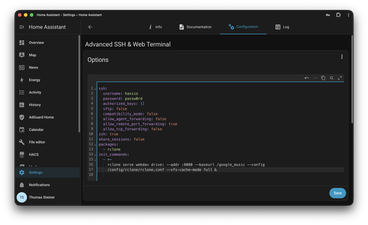
Connect Music Assistant to the rclone WebDAV server
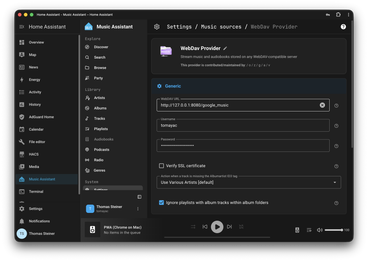
Finally, all you need to do is install Music Assistant and connect it to the WebDAV server that rclone is running. In Home Assistant, open the Music Assistant app and go to the Settings section. Click the Music sources button to add a new integration, and select WebDAV Provider from the list. Add http://127.0.0.1:8080/google_music as the WebDAV URL, and enter your username and password.
Press play
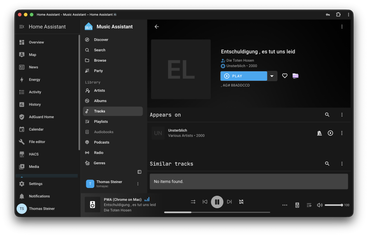
If all went well, you should now see your Google Drive music collection in Music Assistant and can browse it. Some will be embarrassing, some will have aged poorly, and some will bring back fond memories and be timeless. Enjoy the nostalgia!
A personal note
If you like this blog post, please consider sharing it. Let's keep personal blogging alive! This post was hand-written by me with love and a cup of coffee, weird non-native English and all, hitting Esc a thousand times to keep the AI assistance away. If the post helped you, I always appreciate it if you let me know.